Showing posts with label i make stuff. Show all posts

Sunday, April 17, 2011

Butter!

Totally on a whim, I made my own butter this week; and I seriously may never eat any store-bought butter ever again in my life. This stuff is phenomenal.

I started Tuesday with 2 quarts of delicious cream from the Evans Farm Creamery in Norwich. It's the first place I found that had low-temperature pasteurized, nothing-added cream - and this stuff was phenomenally rich and delicious. I don't know what the Evanses are doing, but their cows clearly are liking it.

.....never mind, let's just make whipped cream!

For culture, I put in about 1/3 cup of active culture, whole milk yogurt - again no additives.


I stirred these together, warmed the mixture up slightly on the stove (low heat, stirring frequently) to make sure the culture took, and then covered it with tin foil and let it sit almost 24 hours. It thickened up pretty nicely, and smelled just the faintest bit tangy.

Mixing in yogurt culture

Clabbered and ready to churn!

Lacking a churn, I decided my mixer would do just fine. I wasn't sure about splatter, so I only put about half the thickened cream in the mixer at a time (in retrospect, I probably could have fit it all ok). I put the mixer on the second slowest speed, and let it do its thing. In a few minutes it had thickened noticeably. About that point, I turned the mixer to the slowest speed.  The cream became yellow (why yellow?) and granular, and a little buttermilk became visible. Then - all of a sudden - the mixer was sloshing large grains of butter in a sea of buttermilk. It was really pretty neat.


Beginning to churn the clabbered cream.


Thickening


Grains of butter start to appear...

Things happen pretty fast at this point.

BUTTER!!

Butter/buttermilk break closeup
I strained the buttermilk out and transferred the butter to a bowl, then started washing the butter. To wash the butter, you add water to the butter bowl, and work the glob of butter in the water for a bit, then drain it. I repeated it a second time, and seemed to get all the buttermilk out (buttermilk left in is supposed to turn the butter rancid faster). After I drained the wash water, I worked the glob a bit more to press out water that was still mixed it. Then I added salt, at the terribly scientific rate of 1/8 teaspoon per perceived "1/4 lb stick volume equivalent". The salt was my standard iodized table salt. I worked it all through the butter, then portioned it out, wrapped it in plastic wrap, and put most of it in the freezer.


Unwashed butter


Washed butter, working in the salt
I don't have a scale handy, but it ended up to be a fair bit of butter. I do know that I ended up with 3 cups of the most delicious buttermilk, which my husband turned into delicious buttermilk pancakes this weekend. And, while super-fresh, the butter was practically world-changing. In preparation for this we splurged on two "fancy" loaves of bread from Wegman's, and the cultured butter on a slice of sourdough is practically a meal unto itself -I've never craved bread and butter before.
A diet of bread and butter never looked so good! (Even wrapped in plastic)
I did put most of the butter in the freezer for storage, though, and apparently that was a mistake. The cultured flavor intensified somewhat, which I like less well (still good, just a little bit too cheesy to be called "world-changing" butter). Next time, I'll make less and plan to keep it in the fridge and use it all within probably a month or so. I may also try a more "formal" culture next time - I found that Nancy's was a little sharp for my taste (as yogurt), and a more controlled inoculant might be the way to go. Also, next time I might do some sweet cream butter at the same time, because I'm not yet prepared for cultured butter with my maple syrup on my pancakes... on sourdough, though, this stuff still rocks.

Monday, March 14, 2011

Making pictures

I have been busy lately, though perhaps not terribly productive. The beginning farmer class is taking up actually a fair bit of my time; and there's always the 9-to-5 job, as well. It's been hard to do anything that feels like concrete progress toward the farm. Maybe it's the late-winter blahs (and our recent snowstorms) talking, but it feels like everything for the farmhouse is too big, too expensive, too up-in-the-air for me to actually do anything about right now, I can feel the inertia and helplessness setting in.

Well. We can't have that.

Obviously the cure for this is pick something - anything - preferably easy and smallish and fun, and just do it. I chose a kitchen work table that needs making for the farmhouse. I've looked for one that would fit my needs, taste, and budget, but there doesn't seem to be such a thing out there. It actually will be cheaper and easier to make it this time, even with my hackneyed carpentry skills! I decided I wanted delft-style tiles to top my table, and that I'd need about 90 4" tiles (it will actually probably be less than this, because of grout line spacing, I guess?). You can get decent reproduction delft-style tiles for around $12/tile, or so the internet claims, which puts my tabletop at ..... $1080. Yeah, I don't think so.

I bought a box of 100 plain white field tiles at Lowe's for $16 (they also sell them individually for $0.16, but the box of 100 is more convenient than 90 loose tiles, and gives me 10 spare to play with), and a pot of Porcelaine 150 ceramic paint in Lapis from Michael's for about $5. I also splurged and got a new set of paintbrushes to go with it (another $9). So, for $30, I'm set for tiles for my tabletop - maybe $35 if I need a second pot of Porcelaine 150. Does that mean I saved $1050??

Painting these has been incredibly fun and relaxing, for the most part. Mostly they're turning out beautifully, though I freely admit the dog looks more than a little cartoony (the cat too, come to think of it). Even the questionable ones, though, work in the greater scheme of blue-and-white order. I love it.


I'm about 1/5 of the way through. In theory, when I'm done I'll have 5 spare "picture" tiles and 5 spare "just corners" tiles, so I'll be able to pick and choose a bit if some motifs are outstandingly bad. I could also always turn a "just corners" into a "picture" if I had to, so that expands my do-over factor. I'm not too worried, though, because they're beautiful.

In tangentially-related news, I've been working on my "Epic" afghan again! Those of you who know me on ravelry.com (as "melanogaster") have seen this before, but it's a massive, double-knit, masterwork of an afghan. I worked out the chart myself, based on Schon Neues Modelbuch.

A portion of the chart, turned 90 degrees from what you'd usually expect.

Currently I'm on row 28 of... 348, not counting the 2-row setup and finish (i.e., I'm on the row [column, in the  chart] just to the right of the green line) . But I'm absurdly proud of the silly thing, and I'd be happy to pass the charts on to anybody who wanted them, as long as I got credit - I'll probably make it available on ravelry once mine is done. There will be pics in maybe 10 - 15 more rows, when it looks more obvious to other people. To me it looks fantastic, though.

Tuesday, February 1, 2011

In the works

I've ordered seeds for this year's garden - my typically grandiose, even gleefully excessive, hopes for the garden's bounty, printed out in black and white and given a (hefty) price tag. It's a little more intimidating this way, than when it's merely my perpetually hopeful imaginings of bumper crops and fresh sweet corn... I've never in my life managed to actually -grow- sweet corn, though obviously many people do so sucessfully here and sell it at road side stands up and down this valley. Just not me. Yet still I buy it (this year, it's "Vision", from Johnny's Seeds, with 75 days to maturity and the most appropriate name I've ever seen).

In fact, this year I've purchased 37 varieties of seed for my vegetable garden, possibly a new record for me. I'm feeling very positive in general about planting in the new plot (even if we don't move this year, we're still going to plant the garden up at the farmhouse), with more room, better soil - and more sun.


I've also been working on designing a shawl pattern. It's the most frustrating thing I've ever done for fun, other than gardening. The shawl itself is a simple triangle, knit from the center of the neck down, with a lovely lace stitch called "elfin lace" covering the upper third. The problem happens when I try to switch to a thistle-pattern lace I've been designing, which doesn't want to play nice. Just when I think I'm getting the hang of it, it decides to go and do something totally contrary to what I thought was going to happen! I've been swatching and working on it in the off hours, so hopefully I'll have something to show you in a week or two.


The house progresses slowly. I had really hoped to be further along by now - since it's the end of January - but considering how sick we've all been, we're still making good progress. Even today, I've mostly been lying on the couch with the cat, sneezing and drinking tea and trying to ignore a fever. Working the problem from both ends (preparing the farm and getting this house ready to sell) is exhausting and stressful, and (with the winter weather) takes its toll on a body. However, I suspect that next weekend, we'll be ready to tackle some issues with paint and trim, which will feel like real progress!


I filed the taxes! That's progress I can make even with a nasty headcold.


I've been ignoring the spinning wheel, and I should stop. I miss it. I have a lovely bunch of orangey-red mixed wools (not my dye job, they came that way) that would brighten up the winter blahs and be a fantastic gift for one of my knitting friends.... And then I can practice my dye skills on some of the undyed wools in my "to spin" box.


I'll leave you, then, with some pictures of the Mocha Latte soap. At this stage (just barely three days in), the ammonia smell is gone, becoming instead a mild coffee/cocoa smell. The color darkened dramatically after I cut it, and it looks (to my eyes) almost exactly like fudge. It's sitting in an out-of-the-way place, separated for better air circulation, where it will cure for the next several weeks (I guess).


Sunday, January 30, 2011

Experimental Soap

Today I made soap for the first time - there are no pictures, because I was too busy trying not to mess it up or blind myself with lye or something like that, but hopefully there will be finished-soap pictures later. I'd love to say I made a flawless first batch, but there were some fascinating problems and some frantic mid-project internet searching and still the soap had to be rebatched. No permanent disfigurement, though, so that's good.

Not being one to do things by halves, I chose to start out with a goat-milk soap. I couldn't find a recipe I liked (I wanted to use my tallow, and no other fats), so I came up with my own with a lye calculator. I added some honey for moisturizing, but figured I'd leave it at that - no scents or colors or froofroo nonsense. Basic, I thought. Simple. Ha.

I added my lye to my milk (which immediately turned oompaloompa orange, but no biggie, I'm not picky), and started melting the frozen tallow while the lye/milk solution cooled down. When the tallow was melted, I turned back to lye/milk.... which was, now, soap. No, really. It was a block of spongy, putrid-smelling, orange soap, that leaked orange/brown vile lye-heavy liquid when I broke it up with the spoon. It gave off ammonia fumes like nothing I've ever seen - never mind goggles, I need a respirator! I ventilated the kitchen as best I can, grabbed the cat, and strategically retreated to the living room (closing the kitchen door behind me).

Woe is me! My first soap, ruined before I've even started! The internet, however, assured me that all is well. This sometimes happens with lye/milk solutions, I gather. The milk fats saponify too early, and goat-milk soap often reeks of ammonia. It's ok, it's nothing a stick blender can't fix.

Well, alright then. I'm game.

Back to the (slightly dizzying) kitchen, stick blender in hand. I added the gloppy, foul solution to my glorious, untarnished tallow, cringing slightly and thinking of donuts that could have been. I did my level best with the stick blender to break up bits of lye-heavy milkfat-soap, sclurching it into the rest of the bottle-tan mess. It's a lot of stickblending, and I was getting nervous: goat milk is sugary, and supposedly brings soap to trace quickly - I was also adding honey, which does the same. The mix looked thick - like the pictures I'd seen of "light trace" - so... I'm done? I added the honey, mixed it in thoroughly, and carefully poured the pumpkin-mousse concoction into a loaf pan.

My thoughts, as I putter around the kitchen and living room for the next hour or so:
I hope it sets.
It looks like it's setting!  
I did it! I made soap!
Huh. That was easier than I thought.
It turned white? Why did it turn white?
Maybe the goat milk didn't get as hot as I thought. Maybe the white is the milk... decarmelizing?
No, that's stupid. Hopeful, but stupid.
Well, the only thing -white- in the soap is... the tallow.
Ah, criminy.

It separated. The liquid tallow came to the top and made a lovely white layer, leaving a layer of pumpkin-colored, ammonia-scented, lye-heavy, lose-your-fingerprints-ask-me-how-i-know caustic soap underneath. We had a brief conference about whether this was likely to correct itself overnight, in which HD allowed me to use him as a sounding board to work out my own knowledge of, and unwillingness to accept, the correct answer. No - this will not fix itself by resting over night, or even over many nights. The fats needed to balance the lye are no longer in emulsion, saponification will not occur.

This calls for rebatching.

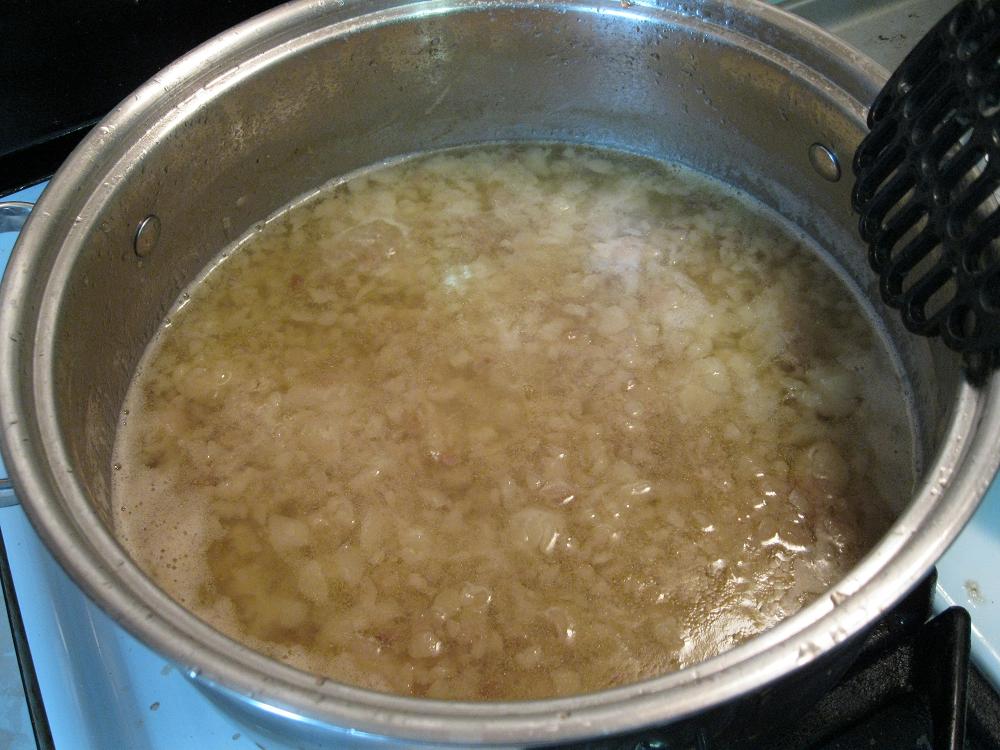
I scooped the still-soft failed batch out of the loaf pan and into a new, smaller pot (I felt part of the problem had been using too large a pot for such a small batch, and right-sizing the pot would help). I put it all on low heat and let it melt, adding just a smidge of cow milk to help it along (also, in case a lack of fluid in general was part of the problem, given how much got tied up in the earlier premature saponification problem). I took the stick blender back to it, and brought it all the way to a heavy trace - a texture like very thick brownie batter. It was on heat the whole time, which seems to have helped the ammonia problem. I also added cocoa powder and ground coffee (dry) for scent and color, and preliminary evidence suggests this will be a beautiful darker soap with a pleasant coffee scent. I should know in a few days, I guess. In the meantime, I'm thinking of it as "Mocha Latte" soap, until a catchier name or contrary evidence appears.

Saturday, January 22, 2011

Tallow

Several friends and I are going in together on a side of beef – “cowpooling” - with the meat in question expected to arrive late February. Having only a small freezer, and expecting approximately 30lbs of beef, I’ve started clearing out freezer space.
One of the things taking up space in my freezer has been nearly 4lbs of beef suet, which I’ve been waiting to render into tallow. It’s been waiting for some time – I think I originally planned to do this before Thanksgiving, and then ran into holiday craziness. This weekend seemed like a good time to finally tackle it!
First, it helps to cut the suet up as small as possible. Last time, I used my food processor, but I will NEVER, EVER do that again – it makes a phenomenal mess! This time, I took a serrated knife and hacked it up by hand, taking care to discard stray bits of connective tissue and so forth. Easy enough, and much less cleanup!
When it’s all cut up, 4lbs (well, 3.8lbs) of frozen suet looks about like this:


I then added about 4 cups of water, with several tablespoons of salt already dissolved into it. The water keeps the suet from burning before the tallow renders out, and gives the solids somewhere to settle into. Salt, I’ve been told, helps “purify” the tallow… magic? Actually, it’s a lot more straightforward than that. It raises the boiling temperature of the water, thus helping render out more tallow, faster. More importantly, it makes the water denser, so you don’t have any wishy-washy semi-separating tallow bubbles.
Get the heat going:


A solid boil, and rendering is well underway:

I swear it's boiling, you just can't tell in this pic for some reason.
I found that, having been more careful with the preparation – tossing out connective tissue and less desirable bits – there wasn’t any of the unpleasant smell I’ve encountered with rendering. Honestly, it didn’t smell like much of anything – it was just steamy. You do have to take care that you don’t manage to boil all the water out from under your liquid beef fat, with all that steam.
Straining the gooey bits out of the good stuff:

I did toss the dregs from the strainer back into the pot to render a little further, though I didn’t get all that much more from them.  When they were all tapped out, we mixed them with peanut butter and some bread crumbs to put out for the birds.  We put the mix in hollowed-out apple halves and hung the result in the maple tree:

Letting the fat cool, without disturbing it:

Hardened tallow:


The plates of tallow need a good wipe down and a rinse under cool water. If they look nice – uniform, creamy white, nothing untoward hanging on, not oily or slimy or grainy but like a cross between butter and white chocolate – then they get dried off and packed carefully in the freezer for later baking or soap making. If they smell like cheap burgers or don’t look rights, then they go back into the pot with some fresh water, I re-melt it, and we try again. I’ve had goosefat hold out for a third boil, where it just wouldn’t separate from the solids and it wouldn’t clarify or solidify until then, but beef suet tallow seems to fix itself the second time around.   This tallow needed a re-melt – it was grainy, with some beefy bits still trapped on the underside, and a faint but distinct burger odor. You can see some of the yuck on the upside-down piece in the picture.  I put a brand new pot of salt water on the stove, broke the tallow up into it, brought the whole thing to a vicious boil, took it off the heat, and then put it straight into the fridge when it stopped bubbling.
All told, I got maybe 2.5lbs of tallow. Perhaps I could have chopped the suet up more for a higher yield to my rendering, but I’m pretty happy with it. It takes up a lot less room in the freezer, and soon I’ll be using it for soap making and maybe some cooking (ooh… doughnuts…. )

yum.